Showing posts with label misc crafts. Show all posts

Sunday, May 25, 2014

1,300 Brads

WOWZA! Thats A LOT of mini brads....or is it?? HA HA HA
Several weeks ago Hobby Lobby had them 1/2 off. Luckily I have 2 HL in town so I grabbed what they had.
So what do you do with 1,300 mini brads AND 13 embossing powders????
You EMBOSS them!!!!!
100 mini brads for each color......SO PRETTY!!!! Lots of FUN too....LOVE IT!!!! Now, I have more embellishments and they fit so nicely in my embellishment boxes that I made.
I got 10 pkgs of the brass mini brads (100 per package SUPER DEAL!!) and 6 pkgs of the white mini brads (50 per package, not that great of a deal LOL) but I wanted 1300 brads.....
Then I came home and started embossing them.
TA DA!!! Aren't they PRETTY!!!!??

clic on pics to enlarge


from top left to right:  beige (tan), black, blue, brown, gray (silver), green, orange, pink, purple, red, white, yellow and gold.


I didn't poke them through the lid cause I wanted to see that they were brads, I didn't want to get them confused with my DIY enamel dots. I stuck them on with a glue dot.
I'm so EXCITED!! my embellishments are expanding......YAHOO!!!

Wednesday, May 21, 2014

DIY Embellishment Boxes

I'm working on expanding my embellishments but I need ORGANIZATION/storage.

clic on pic to enlarge


I have 24 of these boxes, I've had them a long time (forgot I had them)


but I need more and they have been discontinued and I couldn't find them anywhere (ebay, etc.)
OH MY!!! What is a crafter to do??
SAVE YOUR TIME AND MONEY!!!!!!!!!!!!!!!!!!!!!!!
MAKE YOUR OWN!!!!!!!!
DUH! why didn't I think of this YEARS AGO????
I've lost count of how many embellishment containers I've purchased and it didn't work out for one reason or another...aaarrrggghhh!!!!!!! Wasted $$$$$$$$....never again.... 
I made my own!!
 Now, I'll always have an embellishment container!!!
WHOOPIE!! HURRAY!!!!  
I went to the silhouette store and looked at the 3d boxes and decided on #38007.
The original was too big so I shrunk it down.
PERFECT!!!! PERFECT!!!!!!


I deleted all the side panels and your left with 3 pieces (lid and 2 box panels)
I shrunk the size of the lid to 3.25"w x 3.45"h. Then the first box shrunk to 2.19"w x 2.84"h then the 2nd box shrunk to 2.19"w x 2.83"h.  As you can see in the photo above they are almost the same.
When its all put together  height: 1 11/16" 
                                      width: 1 3/8"
                                       depth: 5/8"

SUPER COOL HUH?????
Whats nice about making your own? I can adjust the box size as needed for my embellishments and I can always make more. I was able to get 3 boxes out of one 8.5 x 11 piece of cardstock. CHA CHING!!! LOTS OF $$ SAVED for other crafts!! HA HA HA HA
WAIT! till you see my embellishments in the boxes in my drawer!!!!
SO BEAUTIFULLY ORGANIZED!! LOVE IT!!!!
Yes, I also have a cricut but I didn't feel like searching all the cartridges/handbooks for the proper box.
I'm sure theres a cricut cartridge that has one somewhere. 

Tuesday, May 20, 2014

Some Embellishments

As I have said before "I don't have any embellishments". I'm working on that and I picked up a bag of sequins. WOW! Look at ALL the PRETTY COLORS!!!! and they come in 3 sizes per color....
SUPER COOL!!!!
I sorted them by color and and will store them in these containers.

clic on pic to enlarge


notice the 3 sizes in lower left corner.


That's ALOT of sequins....


Wahoo....My embellishments are expanding...HA HA HA
Oh, I found the sequins at JoAnns and used a 40% off coupon...HA HA thrifty crafter.

Wednesday, May 7, 2014

DIY - Enamel Dots

I haven't been MIA....I've been crafting....I realized I hardly have any embellishments so.......
I made some..LOL!!! This is the latest thing on youtube- Making your own Enamel Dots, it really caught my interest!!! So I went to Michaels and bought a small bag of White PERLER BEADS (found in the kids art section). There's 1000 beads, so I had to "PLAY"..ha ha ha...I took some beads and melted them...OH!! SO PRETTY!!!!!!!! so then I took some more beads and using a "Pill Cutter" I cut some in half and melted them.....OH!! PRETTY PRETTY!!!! They both melt so nicely and are so SHINY!!!


clic on pics to enlarge


 That was ALOT of fun....very time consuming but fun
but wait...I need color...so I went to Michaels and picked up a bag of GLITTER Perler Beads.
OOPPSS!!! not so fun....I couldn't get the "whole" Perler Bead to melt no matter the temp or length of time...uuurrrgghh....SO.. I cut them in half....they melted but they aren't glittery and they shine but not as shiny as the white ones....(its a different kind of plastic too compared to the white ones)


There's 6 colors (opaque: red, yellow, white, blue, purple and green)


I think I'll stay with the original Perler Beads they come out much nicer. No more special/fancy beads.

Thursday, March 6, 2014

Cut my own stencils with the Silhouette!!!

YES! my craftroom is still a DISASTER ZONE!!! but since I had to dig some stuff out to make previous cards......WELL....I decided to play..HA HA HA
I made my own stencils WHAHOO!!!! SUPER EXCITED!!! When I was packing up my crafts to move to another room I found Graftix Stencil Blank .007...What a disaster...no matter what I set the silhouette to,  it just wouldn't cut it and I only had one sheet....urgh....Went to the craft stores and NOTHING!! uh oh....youtube to the rescue....I noticed on youtube  they were using "Show Offs" stencil blanks from Hobby Lobby.....it doesn't state the thickness...ummmm....Well I have a 40% off coupon and they had a variety of sizes but I went with the 6x18 (3 sheets) for $1.99 w 40%off HA HA HA

clic on pics to enlarge


There is a SHINEY SIDE and a DULL SIDE.....WARNING!!! on the shiney side there is a film - yes there
is a covering....REMOVE THAT COVERING!!! REMOVE THE FILM/COVERING!!!!!
I cut my blanks down to 6x6...I'm a card maker I didn't need it any bigger.


OK, here are my stencils!!!!
Cut with the Silhouette Cameo---settings: NEW BLADE set at 9, coverstock, speed 2, thickness 33 and DOUBLE CUT. To be on the Safe side I also used painters tape and taped the stencil to the mat.
It cuts all the way thru but you still need a peircer(something with a sharp point) cause that shiney side still has a plastic coating and doesn't want to release the cuts. You could use an exacto knife too just be very careful.


 AREN'T THEY GORGEOUS!!!!! I'm SUPER DUPER EXCITED!!! The first two patterns can be found in the silhouette store. The zigzag I cut at 3.75w x 5.25h and the circles I cut at 3.865w x 5h (look at the teny tiny circle..thats smaller than 1/8" or .12 and it cut it BEAUTIFULLY). The Lucky shamrock design is mine, well sort of I found the Lucky w/shamrock in the silhouette store. I then copied it ungrouped it or release compound path (can't remember which) then I shrunk the shamrock to .48w x .375h and created my border to fit a 3.75w x 5h cardstock. The stencil it self is 4.25w x 5.50h . The Lucky w/shamrock is cut at 2.115w x 2h and was centered.
What am I going to do with them???? Well, call me a Late/Slow bloomer but I'm suddenly into "mix media"......HA HA...I want to TRY "embossing paste".....its not sold in stores.....aarrgh!!! but I noticed on you tube this product was suppose to be the same....I found it at Michaels in the Art dept for about $10 but I had a 40% off coupon...he he he....


  STOP! Warning!!! I don't know if its the same....put this stuff is a DISASTER!!!! Don't waste your money. Today I order the really stuff "embossing paste" in white from Paper Wishes ( I LOVE this company, very reliable!). link is below  ( I also order some stencils too..ha ha..want to see if its the same thickness as mine) 


in the youtube video's "embossing paste" they stuck glitter and embossing powder to the embossing paste and it stuck.....this stuff that I got NOTHING STICKS!!!! AAAARRRRRGGGHHH!!!!!
Put I'm determined NOT to waste (since I have to wait for the "original" embossing paste) and make do.
Watching the videos.. they used a stencil and embossing paste and got perfection. I made my stencil and used the product above and got DISASTER. I did exactly what they did in the videos....I don't know if my paste is too thick and or my stencil too thin...but I figured it out!!! I doubled up on my "lucky" stencil, in other words I cut another one and sprayed the back of one with TEMPORARY spray adhesive and carefully stuck them together. WOWZA! now thats a thick stencil...HA HA but it WORKED!!!!!
When using the paste it dries very quickly so when you take your stencil off you have to put it in water IMMEDIATELY. So I stuck it in water and finished my project and then went to rinse the stencil off, I rinsed the front and back and patted them dry and carefully pulled them apart and patted the inside and because I didn't use soap I stuck my stencils back together and it restuck...SUPER!
Here's my St Patricks card I'm working on. I used my double stencil and the crappy paste and then sprinkled green glitter...."LOOKS" Gorgeous HUH??? not....if you flick the back to remove the excess glitter it all falls off....Dag Nab it!!! you oh so carefully tap the excess glitter off and try to use a very small paint brush to remove the extra but don't touch anything or MORE glitter will fall off....I did the best I could and will spray it with Krylon Crystal Clear acrylic coating(from HL) and Hope and Pray that no more glitter falls off....HA HA HA...I'm determined to make this my St Pat cards and since this is such a PAIN!!! only my immediate family will get cards. I'll only have to do this 9 more times.......then that'll be it till the "REAL" embossing paste comes in and then I'll play more and post more. You can't see it but it does give it nice demension. The card is cut at 3.75w x 5h it's a bright yellow and I will stick it to an A2 green card (I'll post when all is said and DONE!)
This paste kind of warps the cardstock thats why I didn't just do it on a card.


I also picked up these palette knives at Michaels (set of 5) for around $2.50. You need something to spread the paste.


I got one done...I need to go make the others......HAPPY CRAFTING!!!!

Wednesday, April 3, 2013

DIY - Paper Buttons and more buttons...

OK! We've all seen it on youtube "paper buttons" yeah yeah OK someday......
Well, I put on my creative thinking cap and came up with a NEW IMPROVED PAPER BUTTON!!!
If you have a Silhouette or Cricut cutting machine with DS, CCR or Gypsy you can do this!!!! For me I bought the button(s) patterns in the silhouette store.....easier for me to figure out the sizes.
I'm gonna tell you the sizes so you can make your own.
I did 5 sizes - .75 (3/4") - .685 (11/16") - .625 (5/8") - .56 (9/16") - .50 (1/2")

clic on pics to enlarge


4 shapes in each of those sizes- circle, scallop circle (flower), star and square


I made my cuts on the 8x11 sil mat so I cut 10 buttons of each size on recollections cardstock. you can use a bigger mat(more buttons)...my 12x12 mat needs cleaning and I was too lazy..LOL


I don't mean to brag about the Silhouette....but LOOK at those tiny holes on this smallest square their .055  Look how perfect it cut it!!! thats big enough for a sewing needle and thread to go through. ROTFLOL!!


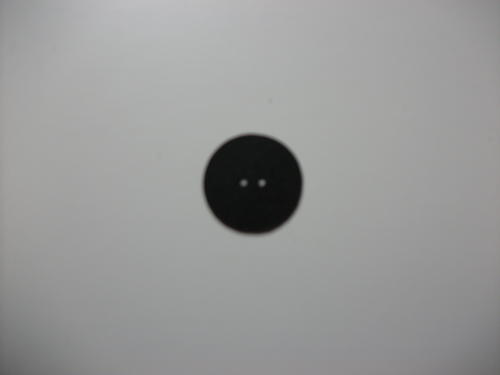
still not impressed - look at these tiny holes on the smallest circle those are .045.....LOL perfect cut again!


I cut all the shapes/sizes in 11 basic colors and stored them by color/size in a 2x3 bags in an 8.5x11 drawer


 What to do with them you say????
 here's a sample....


The possibilities are ENDLESS!!!! MIX AND MATCH SHAPES AND/OR COLORS!!
PRETTY COOL HUH!!!!!! you can also add glossy accents or stickles or liquid pearls or glitter.
Now, are ya excited???
FYI- when stacking your buttons the holes will NOT match up. Glue your layers down and repunch the holes from the top.

Heres the sizes of the shapes and (tiny holes) in inches

circles:  .50 (tiny holes .045) - .56 (tiny holes .050) -  .625 (tiny holes .055) -  .685 (tiny holes .060) -
 .75 (tiny holes .065) 

squares:  .50 (tiny holes .055) - .56 (tiny holes .065) - .625 (tiny holes .070) - .685 (tiny holes .080)
.75 (tiny holes .085)

stars (by height):  .50 (tiny holes .040) - .56 (tiny holes .045) - .625 (tiny holes .050) -
.685 (tiny holes .055) - .75 (tiny holes .060)

scallop circles:  .50 (tiny holes .085) - .56 (tiny holes .095) - .625 (tiny holes .105) -
.685 (tiny holes .115) - .75 (tiny holes .125)

if you can't get the tiny holes to cut, you can use a paper piercer on the smaller pieces and a 1/16 hole punch on the bigger ones.

All the above is PRETTY NICE but I still had to play around some more.....
these designs can be found on the silhouette or the sil store.

these buttons were made with the "fill patterns"----if you have the Cricut Imagine you could do this too


the bottom row is from "fill gradient"


these were made with "sketch designs"


That's all my creativity for now....GO! Make BUTTONS!!!!Have FUN!!!
Paper buttons are lighter and thinner than real buttons. Easier to go thru the mail.

Friday, December 17, 2010

Christmas goodies

Clic on pic to enlarge
Here's some sour cream containers I made for my co-workers....I only need 50 but these are so fun and easy I made 100!!! ROTFLOL... I got the idea from: 
http://shesasassylady.blogspot.com/2010/12/simple-christmas-favors.html
I got the paper at a LSS to get more containers on a 12x12 I cut the pieces at 4 x 3-1/2 (you'll get 9 containers) and on an 8-1/2 x 11 I cut the pieces at 4-1/4 x 3-1/2 (you'll get 6 containers).
I ran red tacky tape along the two long sides then on one short side and brought the two short sides together slightly over lapping to form a tube. Seal one end and crimp it, fill with M&M's and seal it and crimp it. I also made a tag. I used a 1-3/4 round SU punch and using Justrite stamps 1-5/8 round "Merry Little Christmas" stamp set  and applied it to the containers with a glue dot.


Monday, May 24, 2010

angel

I needle tatted this Angel. It took along time because you use crochet thread and it's a bunch of knots. I used a golden silk to underline the skirt and collar. The outcome is worth it - SHE'S HEAVENLY!!