
You could say this marker stand was FREE! I used only the supplies I had already. I have it set up to hold 75 markers but with a few adjustments it can hold over 90 . I have SU markers (48 from the old catty, 12 new colors, 7 Neutrals and 5 in colors) I don't have ALL the markers yet.....but I will soon!!!!LOL The actual stand is 18.5h x 7.5w and its on a lazy susan. Markers are easily accessible!!! Gotta love that....


SUPPLIES: pencil, ruler, SU paper piercer,tape,1/8" hole punch,4 medium binder clips or clothes pins,craft needle, 3 pieces of cardboard 7 1/2" W x 18 1/2" L, shelf liner or contact paper-cut 3 pieces 19 1/2" L x 12" W ea., (red)tacky tape,wide ribbon 2 3/4" W( I used vinyl)-cut 75 pieces 3" long, 1/8"W craft ribbon-cut 9 pieces about 8"long, 144 brads(make sure they are long enough to go thru the cardboard) and a 9" diameter lazy susan.
DIRECTIONS:on one side of each of the cardboard pieces going across find the center(3 3/4"), draw a line all the way down. From the top come down 1/2" and draw a line all the way across. Do this on all three pieces. Under the 1/2" line and near the center line write the letter "T" (so you won't forget which is the top..LOL) From the 1/2" line going down the center line draw a line across at every 5/8" (there should be about 29 lines). This will now be considered the BACK! ALL 3 pieces should look the same! Oh, I forgot ...We need to make a template- you'll need a piece of cardstock 7 1/2" x 1". Put a mark at the center(3 3/4), from the top come down 1/4" and draw a line across, from that line come down 1/4" and draw a dotted line across. From the center line going toward the left draw a line at 1", from the center line going to the right draw a line at 1". Where your 1" lines intersect with the dotted lines punch a 1/8" hole. This is your guide to punching holes on the cardboard pieces and ribbon.

Make sure the center line on the boards is lined up with the center line of your template. Starting at the top slide your template down until the 1/2" line on the board is lined up with the dotted line of the template (you'll see the line thru the 1/8" punched holes), with the piercer poke your holes. Do this on all the 1/2" and 5/8" lines on all 3 cardboard pieces. Get your shelf liner pieces, place the cardboard piece on the liner face down (remember the back has all the markings, you'll still need to see those), center the cardboard piece on the liner making sure theres a 1/2" at the top and bottom and about 2" on each side. Hold in place with binder clips. MAKE SURE THE HOLES AREN'T COVERED!!!!!! Apply the tacky tape to the cardboard pieces at the top and bottom. For the sides figure out how you want to do the corners (I wrapped it like a present and trimmed away the excess). Apply the tacky tape to the liner along the sides and tack it to the board, add tacky tape to the corners to hold everything down if necessary. Get your 75 pieces of ribbon. Going length wise (3") bring your ends together and tape to hold. If you folded correctly your ribbon pieces will be 2 3/4" wide- if their 3"w you folded the wrong ends! Don't crease the bottom! You want that loop to hold your markers. Do this for all 75 pieces.

Get the template again. Find the center along the top of the ribbon and either crease it or slightly mark it. Align the top edge of the ribbon with the solid line on the template. Hold it in place. DO NOT LET IT SLIP!!! CAREFULLY turn it over and with the 1/8" hole punch, punch your holes.


(yes, this is very time consuming....I gave up and used the paper piercer) Do this for all 75 pieces. Add your ribbon pieces to the boards. Starting with the 25th hole from the top and working your way to the top with the piercer repoke your holes- I had to do one line at a time because when you turn the board over you could hardly see where you poked. So after poking thru the back I turned the board over and repoked thru the front again(to make the hole a little bigger)and added the ribbon loop with the brad. I did this for each line.


Labeling: I put my markers in alphabetical order!! my label maker bit the dust so I used the computer font size 12 pt (easier to see/read) and attached the labels to the ribbon with tacky tape (labels were wider than 1/4" so I taped it down with scotch tape). I put the markers in before attaching the labels so I would know where to place them. To form the triangle on each of the boards on both sides come in 1" at the top and bottom and poke a hole, come half way down and poke a hole. With the craft needle thread the 1/8" ribbon and tie a bow at the top, middle and bottom.
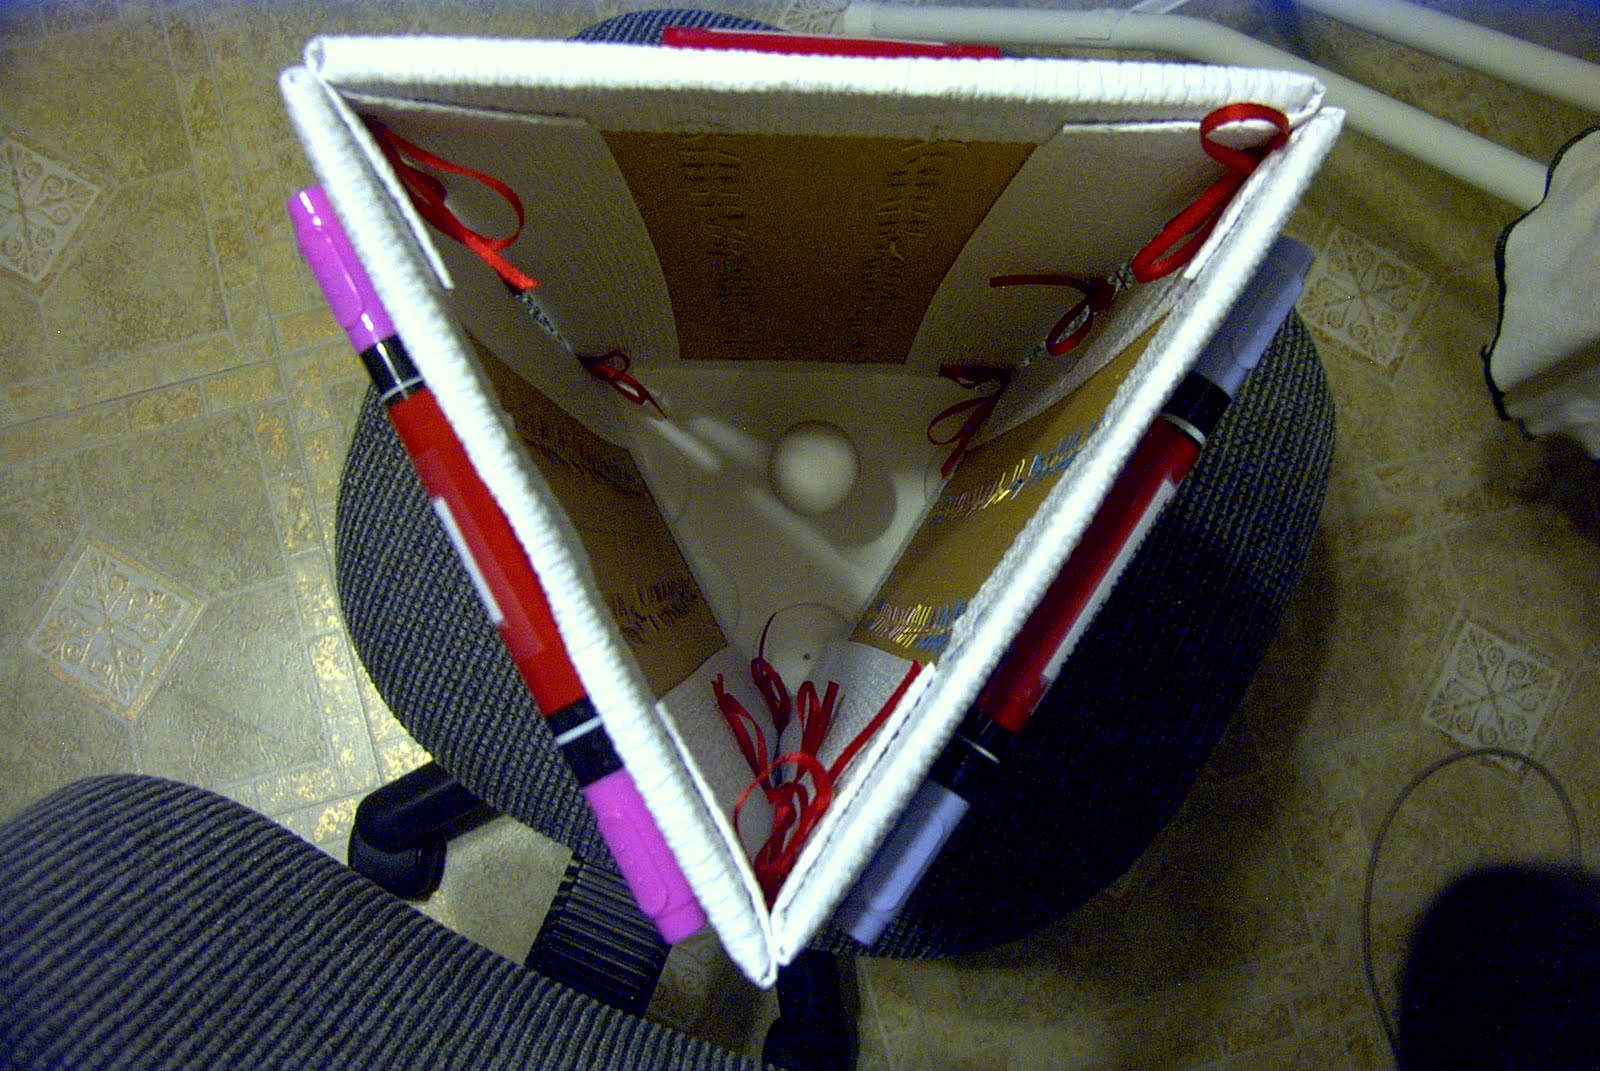
.JPG)

Place on lazy susan. your DONE!!! ENJOY!!!!!
If you need more storage....remember theres extra holes we didn't use or you can space your holes 1/2" apart instead of the 5/8". You can adjust the length too. I cut mine at 18 1/2" cause theres a shelf above my work area and with the stand on the lazy susan it just fits. The ribbon loops are attached with brads so when you get more markers you can move them accordingly!!! I'M HAPPY TO SAY "I'LL ALWAYS HAVE ROOM FOR STAMPIN UP MARKERS!!!!
Very clever and well done.
ReplyDeleteYOU are a very creative woman!!
ReplyDelete